__For many of us, going places is one of the wonders of flying. Many instructors like to take potential flight students on a short cross-country flight during the initial introductory flight in order to whet their appetite for the reward that awaits after they complete their primary training. Getting kicked out of the pattern is a bit like getting kicked out of the nest. With enough preparation, you are ready to literally try your wings and go somewhere. Except for the "long" required cross-country flight, most of your early trips were relatively short.
Some pilots are content with short out and back flights for a hamburger or to watch the sunset. That's fine if that's what you want to do. But if you're planning to use your airplane for transportation, I recommend a long, long VFR cross-country flight to hone your aviating skills. A long trip crosses political and geographic boundaries, typically exposes you to weather differences, and requires you to consider fuel consumption and availability and deal with the unfamiliar. Making a real long cross-country after getting your private rating is like earning a graduate degree.
Once the strategy, the preflight planning for the trip, is completed it's time to tackle the tactics and make the flight.
I'd have to bury my head in the sand not to recognize that the planning and flying of a VFR cross-country flight have changed a great deal in the last several years with the advent of GPS navigators and moving map displays. But things happen, so it's still important to learn and practice to navigate by the basics - even if it isn't required by the PTS (Practical Test Standards).
Traditionally, there are three ways of navigating: deduced reckoning, pilotage and radio navigation. Dead or ded reckoning is the most primitive, but a surprisingly accurate method of navigating. Essentially, you adjust your magnetic heading to make good the course to your destination by calculating the effect of the speed and direction of the wind on your track across the ground.
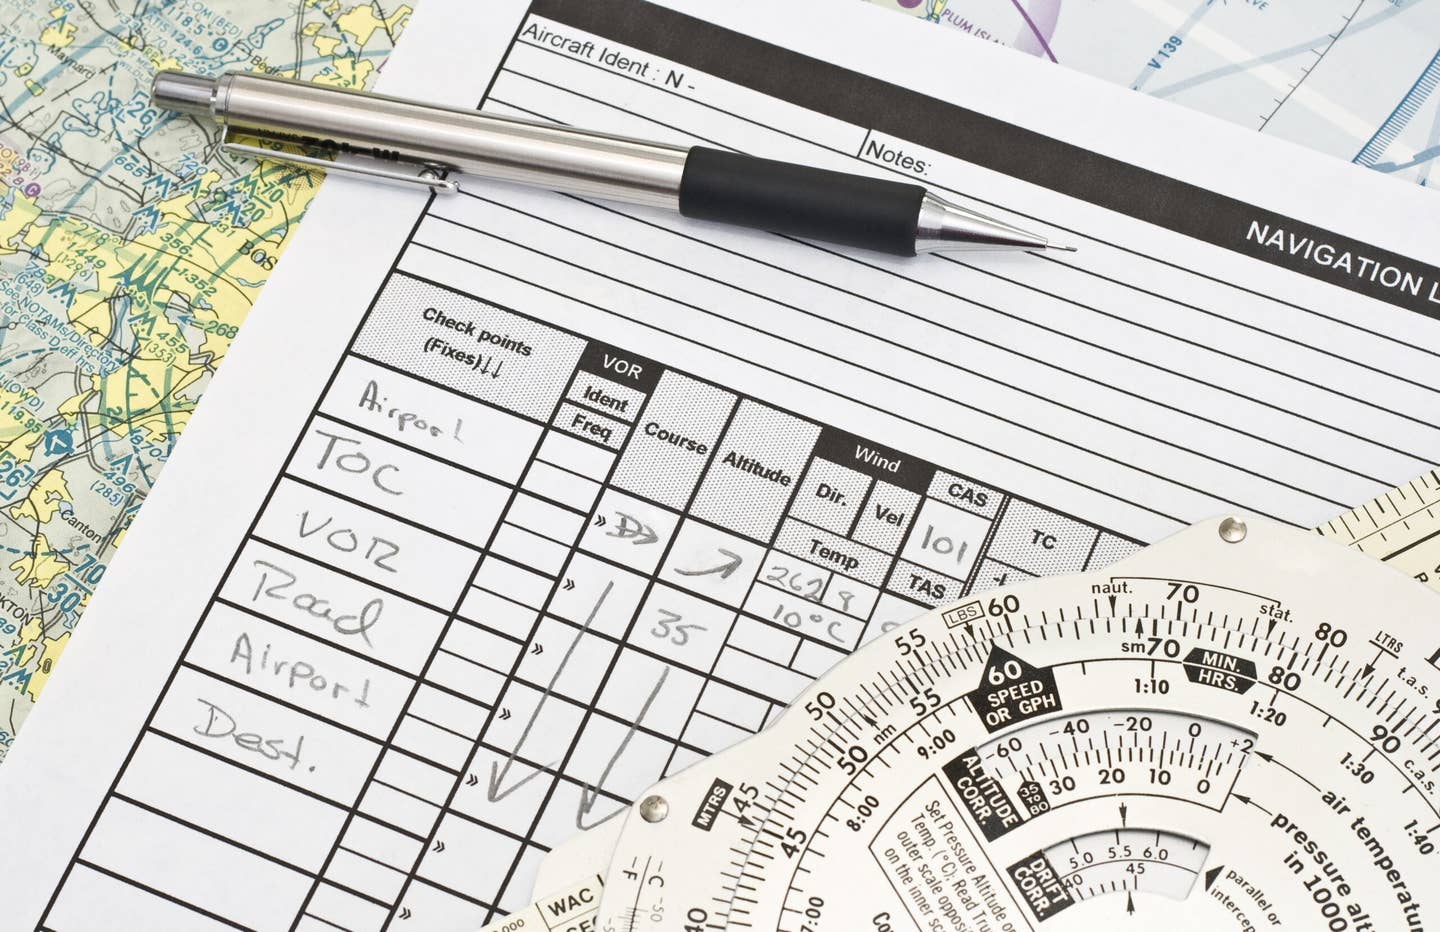
Pilotage is probably the most satisfying form of navigating because in addition to tracking your course across the ground, it requires that you observe the world "beneath your wings." With a line drawn on a sectional chart between your departure and destination airports, you mark checkpoints along the route and measure the distance between each. Flying from one checkpoint to the next will get you to your destination. By recording the time between each checkpoint and knowing the distance, you can calculate your groundspeed and confirm you'll have sufficient fuel. From your preflight planning you'll know the anticipated wind correction angle and your estimated groundspeed. Working out the time-speed-distance problem between each checkpoint will confirm your calculations.
In picking checkpoints, it's important to recognize that some things marked on the sectional will be easier to see than others. Railroad tracks and small rivers can be hidden below trees in summer; small rivers and lakes can freeze in the winter and may be covered with snow. Select checkpoints off to the left side of the course line drawn on the sectionals. Trying to time your passage over a checkpoint directly under the nose of the airplane won't be as accurate as it will be if you note when the leading edge of your wing passes over a checkpoint out your side of the airplane.
If there are highways going my way, or ridgelines or rivers, it makes it much easier to stay on course. The more obvious the checkpoints are - and the better the visibility - the farther apart you can make them. When looking for checkpoints you've chosen, it's important to remember that everything on the sectional should be on the ground, but not everything on the ground will be on the sectional. Tactically, instead of peering into the distance to watch for the next checkpoint, you should be constantly following along on the sectional.
Holding a heading is a lot more accurate if you remember to set the DG against the magnetic compass before departure. You'll want to periodically check to be sure the DG hasn't precessed as you fly along. On a student cross-country flight I had to hold a 45-degree wind correction angle to stay on track from Morristown, New Jersey, to Harrisburg, Pennsylvania. I couldn't figure out why the wind was so much different than forecast and from what I expected from the preflight planning. It wasn't until I got ready to make the return flight that I realized I'd never set - or checked - the DG against the compass before and on the flight out. I learned that lesson.
A cross-country flight using radio (VOR) navigation requires that you fly from VOR to VOR, having calculated the wind correction angle for each segment of the flight. It's a good tactic to be particularly vigilant and fly a couple hundred feet off the required VFR hemispheric-rule altitude (odd thousands plus 500 for headings of 000 to 179 degrees and even thousands plus 500 for headings of 180 to 359 degrees) when you're crossing a VOR because there may be others using the VOR for guidance.
It's important to be sure that everything you need is handy in the cockpit. You'll want to have pencils, pens or china markers accessible for jotting down AWOS/ASOS or ATIS information. Sectionals should be within easy reach (I number the top of the charts in the order I need them so I'm not distracted trying to figure out which chart comes next). An E6-B or calculator, a plotter or ruler, batteries for your headset or flashlight should all be within easy reach. If you've got advanced avionics onboard you might want to keep the "quick reference" cards nearby.
Today, cross-country navigation has changed - dramatically. The revolution began with RNAVs (area navigation) that allowed you to create a course by "electronically" creating virtual VORs along a straight-line route and continued with GPS navigators and moving maps. But Murphy's Law (if anything can go wrong, it will) applies, so relying on your GPS can be a mistake.
On the other hand, if you have a GPS there's nothing wrong with using it to back up your flight planning. The GPS will confirm your groundspeed calculations and your estimate of how long it will take you to get to your destination.
Once you're under way there are four things you have to constantly assess: whether you're on course; whether the weather (winds and clouds) is doing what was forecast; whether there are other airplanes trying to occupy your airspace; and whether you still have enough fuel to reach your destination. You can get help avoiding other airplanes by asking for flight following. If their work load permits, air traffic controllers will provide traffic advisories. It doesn't eliminate your requirement to "see and avoid." Watching for traffic, you want to be careful not to fixate and continue to scan in small segments of the sky. If traffic appears on the horizon and doesn't seem to be moving it means - unless something changes - you're on a collision course. Whenever traffic is called by a controller, I always look in the direction advised. If I don't see the traffic quickly, I'll look to the other side of the sky, just in case the controller's gotten his directions confused (it happens). If I do see the called traffic, I'll still look in the other direction to make sure no one's sneaking up on me while I'm distracted by the called traffic I'm watching.
You've taken care of the course with your flight planning and proficient pilotage and radio navigation. From your calculations you know what the winds are doing and the weather should be obvious to you by looking out the windscreen. If you have any questions about what the weather's doing ahead, you can monitor or call Flight Watch (EFAS or En Route Flight Advisory Service) on 122.0. Flight Watch is designed to provide pilots - who have already received a preflight weather briefing - with weather advisories that apply to their route and altitude. The service is available over the continental United States from 5,000 agl to 17,500 msl, but is accessible at lower altitudes within reach of a ground station. When you call it's important to indicate where you are in relation to a nearby VOR so the closest Flight Watch station can respond. After explaining what you need and getting a response, it's good practice to give a pirep (pilot report) about the conditions you're experiencing, cloud cover, temperature and winds. That way other pilots will have the advantage of your observations. Using the sectional you can also monitor the automatic weather reporting stations (AWOS/ASOS/ATIS) that are within range. If you're concerned about a strong crosswind at your destination, sampling the reports of nearby airports may help you find one where the wind is blowing closer to straight down the runway. Nothing wrong with changing a destination if it seems prudent. Discretion is always better than trying to prove your valor.
Unfortunately, there are more occurrences than there should be of pilots not diverting to alternates when it should have been obvious that it was necessary. Too often, airplanes hit the ground just short of their destination. The only blessing is that there's little chance of a fire since there's usually no fuel left in the tanks.
The rules that define fuel requirements are ridiculous. If you think planning a flight to land with 30 minutes of fuel remaining (45 minutes at night) at your destination is wise, then chances are pretty good you're going to make a lot of flights with an uncomfortable level of anxiety as you approach your destination.
Assuming that everything is going to go as planned is a gamble. Any number of things can cause a delay or the need to go to an alternate airport. Deviating for weather, stronger winds than forecast, an airshow in progress at your destination (I know you normally check the notams), a disabled airplane on the runway and a TFR (temporary flight restriction area) can require some quick calculations of remaining fuel.
The accident records are replete with pilots who were surprised when their engines sputtered and died. Typically, the accident site is within five miles or so of the destination airport and the pilot blithely flew over several airports on his way to the power-off landing.
One of several recent "confessions" to the Aviation Safety Reporting System (ASRS) should serve as vivid object lessons: "The planned flight time was 3.2 hours. There were 24 gallons of usable fuel on board. Expected fuel burn was 4.8 gph. There should have been enough fuel for 5 hours. The fuel was exhausted after 3.7 hours. Fuel burn data was established a year and a half previously when using aggressive leaning at all times and at relatively low power settings. Three weeks prior to the flight in question, the A&P mechanic performing the annual inspection advised the pilot that excessive leaning was harmful to the engine and suggested that it should not be leaned unless above 5,000 feet msl. The flight in question was conducted at 5,000 feet msl. In addition, the pilot began using higher power settings, believing this was desirable for this engine."
I'm surprised at the mechanic's recommendation of not leaning below 5,000 feet. The 5,000-foot rule is designed to protect an engine. If the mixture is leaned and the pilot calls for full power-at altitudes where the engine can achieve high power - there can be damage to the engine. At 5,000 feet, most normally aspirated piston engines can't produce more than about 75 percent of power, so manhandling the throttle won't cause a problem. But there's no reason not to lean an engine at altitudes lower than 5,000 feet as long as it's enriched before the throttle is advanced to call for full power, as in a go-around. If you do find yourself running low on fuel, it's important to alert the controller to your problem. You have two options. You can advise that you are "minimum fuel," or you can declare an emergency. If you declare "minimum fuel," air traffic control has no obligation to give you priority handling. "Minimum fuel" means that your fuel supply has dwindled to a level where you can't accept any undue delays. If you need priority handling, declare an emergency and let the controller know how many minutes of fuel you think you have remaining. The paperwork for declaring an emergency is nothing compared to that required if you run out of fuel.
Flying VFR, you get to choose your altitude - providing you can stay clear of clouds - and that can have a lot to do with your fuel endurance. As a general rule, when heading west you might want to fly lower than heading east in order to avoid stronger head winds. Flight planning will have given you a good idea of the forecast winds at different altitudes and your en route calculations will confirm the wind speed. Flying at higher altitudes often means a smoother ride. If your schedule allows it, you'll want to fly west in the morning and east in the evening to avoid flying into the sun.
Well out from your destination you should listen for the automatic weather reporting system or for other pilots announcing their positions in the pattern. From the ATIS/AWOS/ASOS or Unicom you'll have a good idea of which runway is being used. If you hear someone call, "Downwind for Runway 3, full stop," that's a good indication that Runway 3 is the active runway and there's no reason for you to call in and ask, "Which way are you landing?"
When you do call in to begin announcing your arrival, it will help everyone in the pattern-and approaching the airport - if you're good about indicating how far out you are and in which direction.
Ideally, you'll plan your descent from your cruise altitude to arrive at least a couple of miles from your destination at pattern altitude so you're not descending into the pattern. At pattern altitude it'll be easier to scan for other traffic in the pattern, since they'll appear on the horizon and not be obscured by ground clutter.
It takes a little simple math to determine when to begin your descent. If you're going to descend at 120 knots with a descent rate of 500 feet per minute, it will take you four miles for every thousand of feet you lose. Let's say you're cruising at 8,500 feet and the airport elevation is 500 feet. You'll want to be at pattern altitude (1,500 feet) about three miles from the airport. You'll need to lose 7,000 feet. Four times seven (thousand) is 28. You'll need to start your descent when you're 31 miles out from the airport, so you'll be at 1,500 feet three miles from the airport.
I'm always surprised when an accident report indicates that the pilot failed to file a VFR flight plan. Many flight schools require that students file a flight plan on every cross-country flight and it's a good habit to get into. A VFR flight plan is an insurance policy that will pay off if you have to land off-airport somewhere.
Unless you're heard from within 30 minutes of the time you indicated in your flight plan as your estimated time en route, a search will be initiated to locate you and your airplane. If phone calls to your destination and other likely airports along the route don't turn up your presence, a search and rescue operation will be initiated. If you're landing at a tower-controlled airport you can ask the controller to close your flight plan, otherwise, you'll have to call the 800/WX-BRIEF number to close it.
If it's been a while since you've made a VFR cross-country flight, you're missing out. Plan the strategy carefully but fly tactically, taking into account changes that inevitably occur, and you'll find a VFR cross-country a nice reminder of why you started flying in the first place. Turns out, you really can get there from here, and getting there is often more than half the fun. Enjoy!

Subscribe to Our Newsletter
Get the latest FLYING stories delivered directly to your inbox

