fbpx

Left Seat: Anatomy of an Annual

What's scary about annuals; recurrent training on FlightSafety's CJ2+ simulator.

What really scares pilots and airplane owners? Is it an instrument approach to minimums? Not really. With proper training and a good flight director, nailing the approach is a piece of cake. How about a crosswind landing? They’re tough, but with practice you can learn how to master the technique. Maybe thunderstorms? Nah. Having satellite-delivered Nexrad radar images in the cockpit has taken the surprise out of boomers.

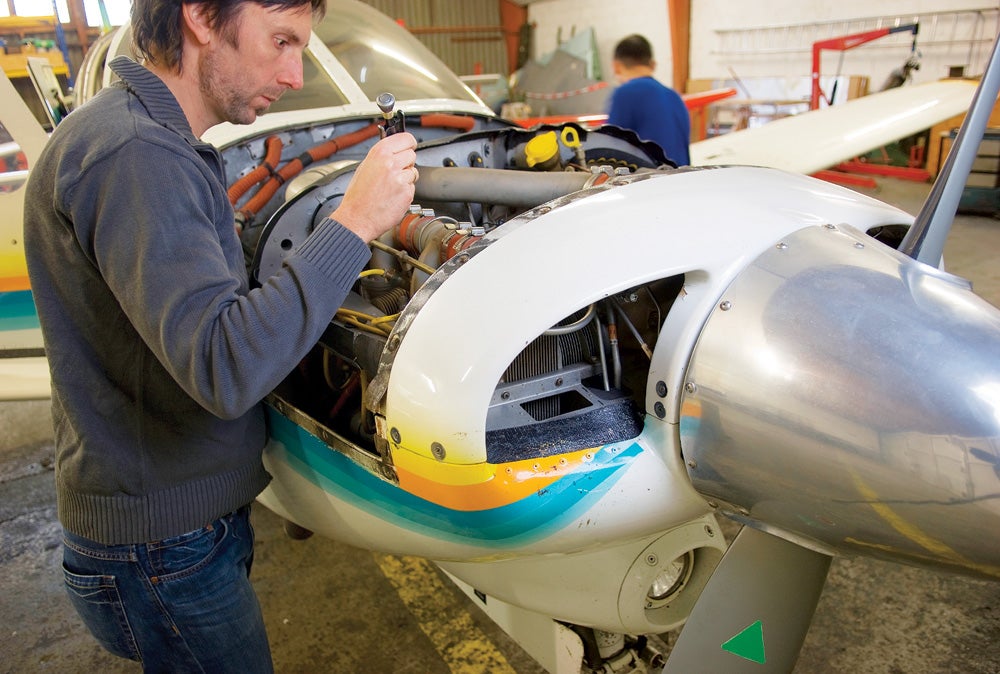
The real fright for pilots and airplane owners is sending their airplane in for its FAA-required annual inspection. No matter how fat your logbook, or how many years you have been flying and owning airplanes, fear of the annual cannot be tamed, and you can’t possibly know what to expect no matter how many times you have been through the process.

The annual inspection is conducted by a mechanic who has been certified by the FAA with inspection authorization (IA). The IA is actually a designee of the FAA and is literally acting on the agency’s behalf to confirm that the airplane meets the standards of its type certificate. There isn’t, or at least shouldn’t be, anything casual about the annual inspection process.

The reason the annual holds such terror for airplane owners is that it is impossible to predict what defects — called squawks in shop talk — the inspector will find. The inspection is comprehensive, and every part of the airplane, its engines and systems, must conform to the FAA specs. Depending on the squawk discovered, the bill could soar to many thousands of dollars, and in a worst case, the airplane could be stuck in the shop for weeks waiting for an obscure replacement part.

It’s been nearly 40 years since I sent in my first airplane — a 1946 Cessna 140 taildragger — for its annual, and even after all of those years, I still can’t know what to expect when the next annual rolls around. A surprise squawk and repair on the old 140 was a hundred bucks or so more than expected, but when you don’t have the C-note, it might as well be $100,000. With my Baron, the potential expenses are many times greater, but the anxiety is the same.

Any good shop will price the annual inspection at a fixed cost based on the number of hours needed to gain access to all key areas of the airplane, inspect them, perform normal lubrication and adjustments, and then reassemble the airplane. But the cost of the inspection is just the beginning. Every squawk found must be corrected, and the cost of that in parts and labor is extra, and totally unpredictable.

One thing I have learned is that there is not any relationship between what you think is wrong with your airplane when it goes for its annual and what the real problems are. In fact, it seems to be the inverse. When I send the airplane in with only one or two minor squawks that I am aware of, the inspector finds a whole raft of problems. If I have a list of things I want fixed when it goes in, luck seems to ensure that those are the only problems found.

When my Baron went to the shop late last fall, there were two specific items that I knew of to be repaired, but in truth, I also had a high level of dread that some expensive issues were lurking under the left engine cowling.

The squawks I had were failure of an EGT probe on the left engine that happened the flight before going to the shop, and worn bushings or fittings on the elevator trim tab, probably the left side. The EGT failure was pretty easy to identify because it had died a few days before the annual. And I had had the trim tab mechanisms worked on in the past, so I knew the symptoms of excess wear. When the rod ends, bushings and bolt that connect the trim tab to its control rod wear too much, I can feel a change in vibration in the control wheel at airspeeds near the limits. In a Baron you can also look back and see the horn on the elevator and watch for a little vibration at high speed. This isn’t flutter, but excess play in the mechanism that has to be resolved with replacement of several expensive parts.

I was right about the trim-mechanism wear problem, and it was confined to the left elevator, but the replacement rod cost $403.58. Two bushings were replaced with one priced at $196.79 and the other at $87.27. And it’s a big deal to get the rod and bushings out and the new ones installed, so many hours of labor costs were added to the bill.

The left engine is elderly and closing in on recommended TBO. It is out of phase with its mate on the right side because that engine had to be replaced a couple of years ago when an alternator drive-gear problem would have required disassembly of the entire engine to fix. The left engine was running perfectly smoothly and had normal mag drop and consistent fuel flow. But oil consumption had crept up to around three to four hours per quart. That is within Continental’s oil consumption limits but gave me reason to suspect that the shop would find problems with one or more cylinders.

Sure enough, two cylinders had compression below limits, and the air injected for the test was leaking out around the exhaust valves. The inspector could hear the rush of escaping air by listening at the tailpipe. A leaking exhaust valve is unacceptable so off the two cylinders came for overhaul. That was a $1,312 surprise per cylinder, plus labor to remove and install.

Even though I was suspicious of cylinder problems on the left engine, I had no inkling there were valve lifter issues. When the hydraulic lifters were bled down to check their function, three failed. When the lifters were removed, there was the beginning of spalling on the face. The camshaft itself had minor wear, well within Continental’s service instructions, but that wear may grow during this year. Three lifters cost another $541.44, plus there’s the worry that the cam may be next to go.

And that failed EGT probe. Well, who knows if there is a link, but the part of the exhaust system it was attached to was beginning to fail with a blister forming at the radius, so that piece had to be replaced. Who could have guessed that before the inspection, but it added another $656.25 to the parts bill, plus, of course, more labor and parts shipping cost.

Hartzell propellers are refilled with grease during each inspection. It’s a good design because the working parts in the propeller hub are constantly immersed in grease, which keeps out moisture and helps prevent corrosion, the major threat to propeller function and safety. The mechanics remove a small bolt in the hub and pump grease in from another location until it oozes out the opening where the bolt was. That way you can be sure the hub is properly filled with grease.

As the mechanic pumped grease into the right prop hub, no grease emerged from the opening. Oops. That meant the grease was flowing into a part of the hub where it didn’t belong. At least one of the internal grease seals required replacement, so off came the propeller to go to the prop shop, which is certified to perform that type of repair. Another $1,084.31 on the parts bill, plus more shop labor to remove and reinstall.

When the inspector was checking the workings of control cables and the landing-gear retraction mechanism under the cabin floor and out in the main gear wheel wells, he spotted corrosion forming on the gear extension rods. Not too surprising given the age of my airplane, and the fact that until a few years ago it had to sit outside because no hangars were available at my home base. Out came the rods, the corrosion was removed, and new epoxy will protect them for many years to come. Not much in parts expense, but more shop hours of labor.

Research of logbooks found that the vacuum pump on the right side had nearly 650 hours since replacement. That’s more than I think any of the big pumps has ever lasted on my airplane, and it was overdue for replacement. Ring up another $890 in parts. Some of the toggle switches that also function as circuit breakers were the subject of an airworthiness directive (AD), and the switches were finally available after a long back-order delay. Another $989.30 worth of parts. A dozen spark plugs and their gaskets cost $378.96. A cam that operates the throttle switch on the left engine to sound the gear warning horn was $108.51. Two ducts that transport air from the cowling scoops to the engine induction were $80. And so it goes.

This is not at all a complaint about the shop I use. In fact, it has done a superb job of getting the airplane done, despite the surprises, when it promised. All of the work is absolutely first-rate, and the record keeping, which is as important as the actual work, is complete and precise. The shop found replacement parts, such as the valve lifters, when they were in very short supply industrywide. And it used certified overhauled parts or made shop repairs when possible, all to help contain the costs.

Thanks to the diligence and expertise of the inspectors and shop, my airplane now conforms to its type certificate in all details, which is exactly how the process must work. Expensive surprises are simply an unavoidable part of airplane ownership, and next year I’ll try to steel myself for some more of them.

Simulator Workout
I had been doing my annual recurrent training at FlightSafety in the original Cessna CJ light jet for the past several years. However, that simulator was banished to make room for newer models, so last December I did the training in the CJ2+.

Fred Pfeiffer gave me the usual engine and system failures. I flew the “dark tube” approach using only the standby instruments, and I made the emergency descent, single-engine go-arounds, circling approaches at minimums at night and all types of nonprecision approaches, sometimes to weather below minimums with a guaranteed miss, that are a part of all recurrent training.

Then Fred set me up for a takeoff on the tiny Runway 36 at Will Rogers Airport in Oklahoma City. The runway is only 3,079 feet long.

We loaded up the CJ2+ with fuel and passengers and set the air temperature so that the required runway was as close as possible to the 3,079 feet available. In a jet, the required runway is long enough to accelerate to a decision speed (V1), lose an engine at that point and still stop on the remaining pavement. Or, if an engine fails at a speed above V1, enough runway remains to continue the takeoff safely with a minimum climb gradient to clear all obstacles with power only from the remaining engine.

This time I knew an engine would fail right at V1, so I was cocked and loaded for the abort. When the engine quit at V1 speed, I jumped on the brakes as hard as I could, yanked the power back and extended the spoilers. With accurate flight test data, I stopped with maybe 200 feet of pavement to spare.

Fred set the conditions of weight, temperature and so on so that landing on that same little runway would require nearly every foot of the requirements in the airplane manual. There is absolutely nothing except flat turf short of the runway threshold, so I held the VREF target approach speed as close as I could and aimed for a firm touchdown on the numbers. With maximum braking immediately after touchdown, I stopped with maybe 250 feet to spare.

But my flying was a maximum effort in smooth air, and it was close to using all available runway. The test pilots who collected the data couldn’t aim for the numbers because they had to cross the threshold at a minimum height in a steady three-degree descent to touchdown, so I gained some runway distance there by hitting the numbers. The lesson — more important than the engine fires and dual generator failures — was that the airplane will do what the book says, but the pilot has to fly exactly by the book. Throw in some wind, turbulence or airspeeds even a few knots faster than Vref target, and you won’t get stopped. That’s an important lesson when you think about shoehorning an airplane into or out of the minimum runway — and runway overruns, not engine failures or loss of systems, are what show up most often in the business jet accident record.

Login

New to Flying?

Register

Already have an account?