fbpx

Part 2: Cessna 172 Skyhawk Avionics

Corey and the team have removed the legacy panel.

Upgrades are supposed to be fun. You and your significant other are lugging carry-ons, purses, and laptop cases, slugging them back to steerage, praying for a sliver of overhead space to avoid flying with your knees up in your chest. A flight attendant spots you and comes racing in for the rescue. You and your companion have been selected for an upgrade to first class. Mimosas, here we come! Yeah, those are not the aviation upgrades we are talking about today.

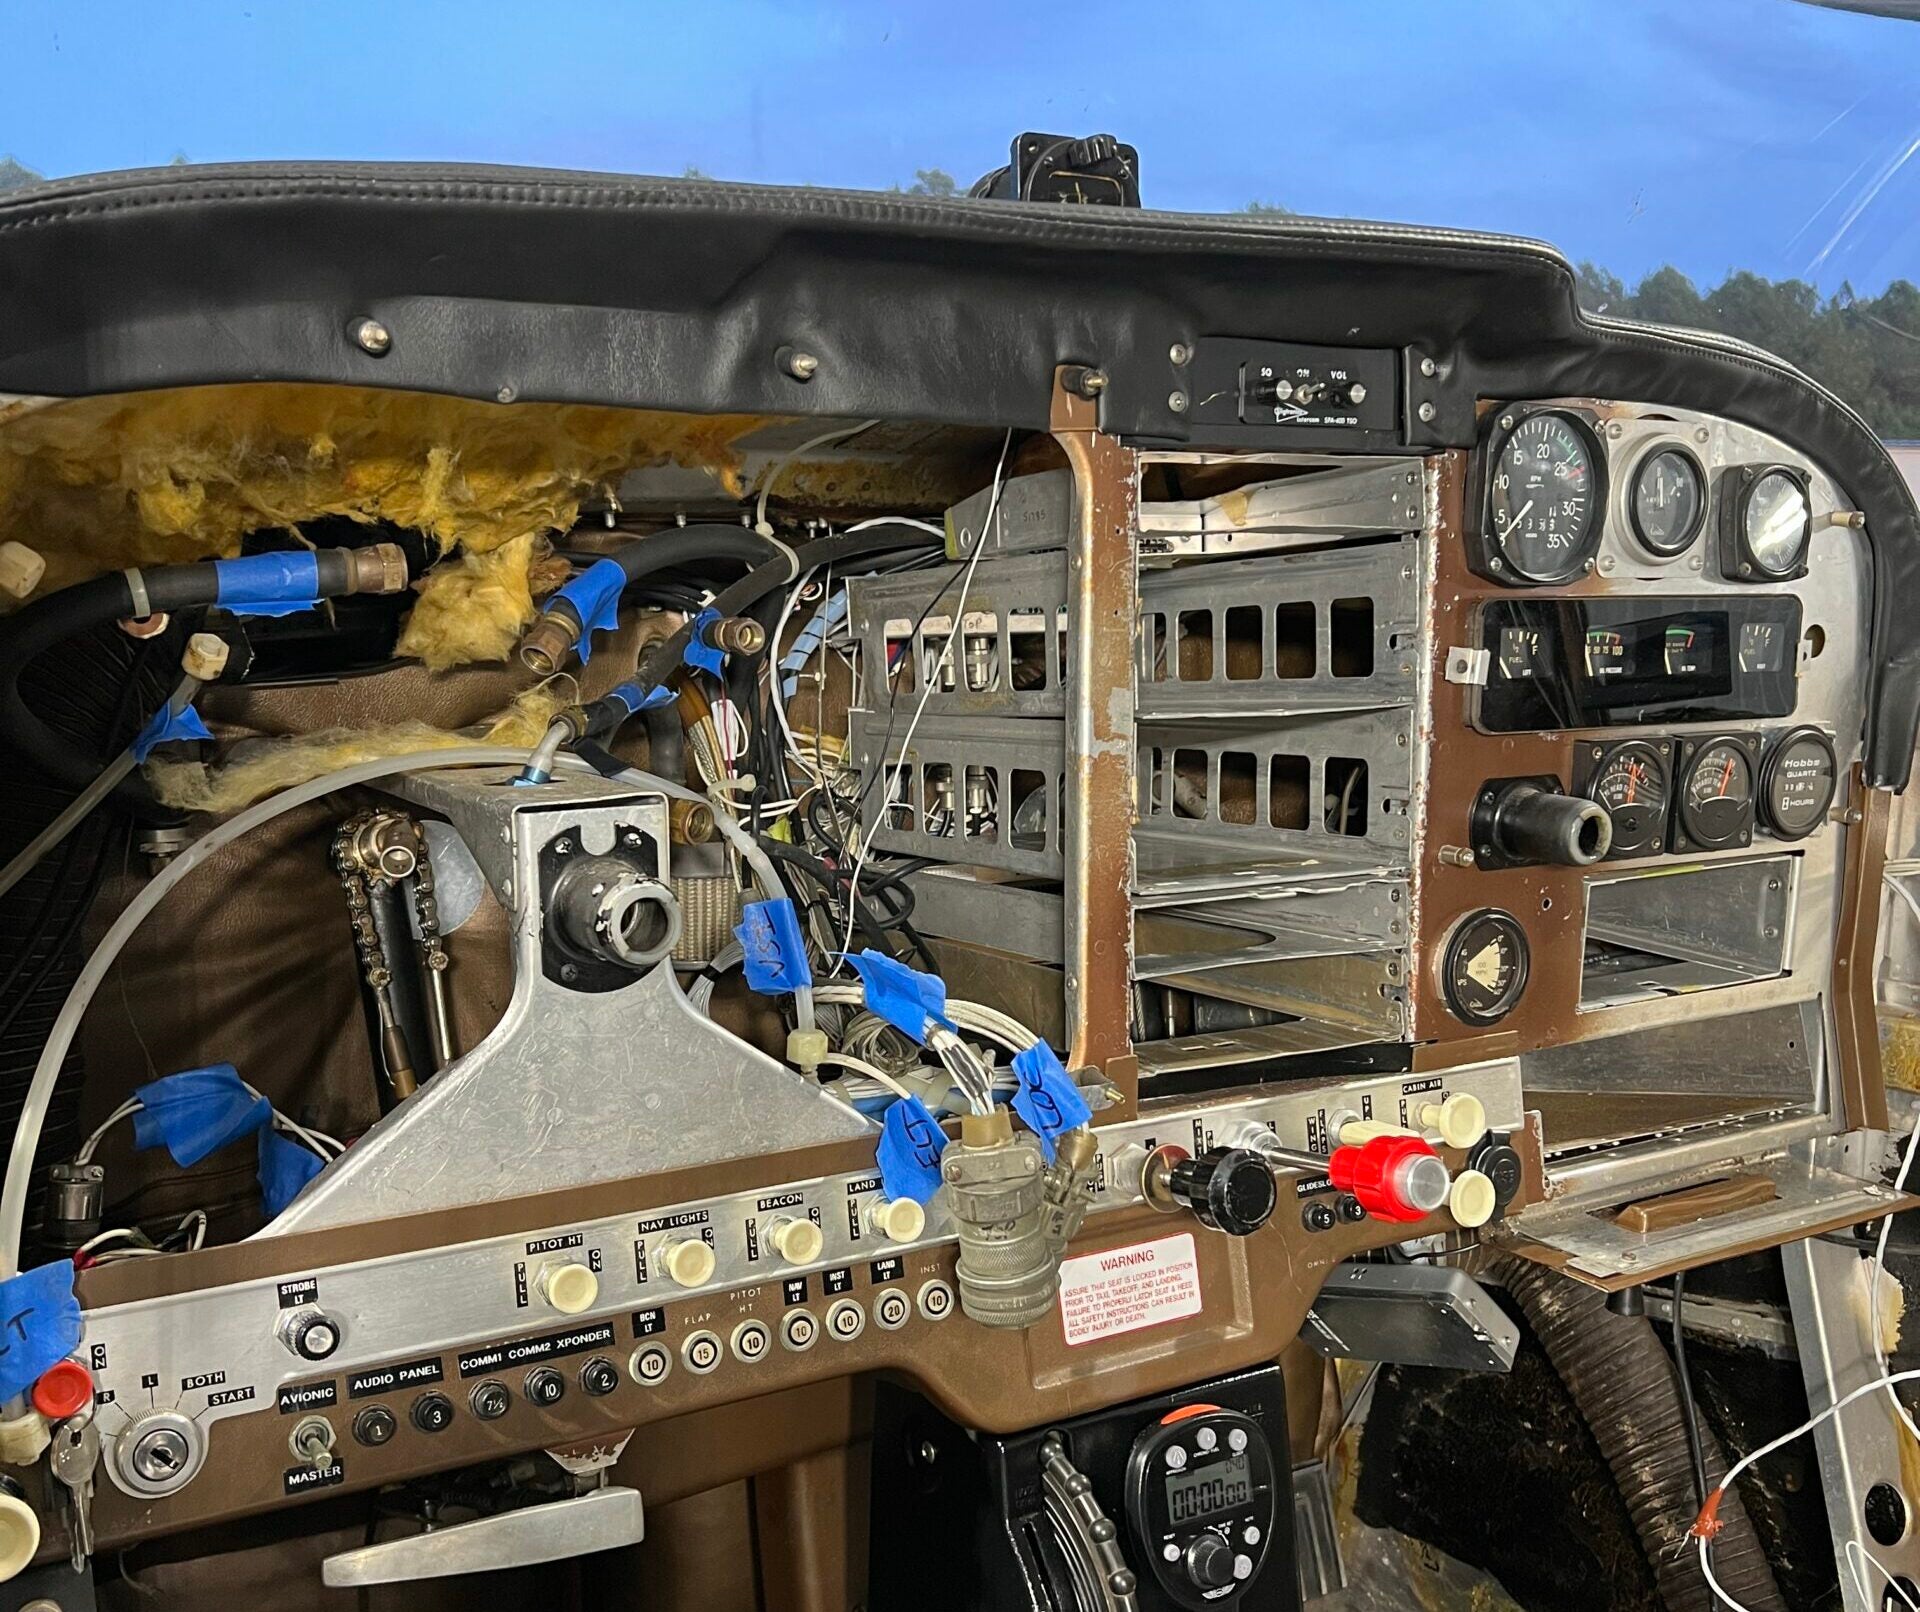
No, these upgrades don’t come with steamy towelettes and tons of legroom. The upgrade on the docket is a little more involved as we go about removing legacy components that have been in place for decades—ah, the stories they could tell—and replacing them with repurposed avionics from a once hangar mate. Out with the old and in with the new!

When last we left Corey, he had received the pull-off avionics parts from Stephen’s Saratoga and was prepping to install them in his 1966 Cessna 172H Skyhawk. All set up in his T-hangar, it was time to get down to business. You heard me correctly, ladies and gentlemen. After months of planning and a can-do attitude, Corey got busy pulling apart his panel.

Careful, Diligent Removal

Disassembly is easier than it sounds though one does not simply go ripping and snatching on aircraft components. While it is true these are pull-off units, they do have value. Corey could pass them along to another, as Saratoga Stephen did for him, sell them as cores, or keep them as souvenirs. The first order of business was to map what was to be accomplished before laying wrenches on it.

As the pieces come out, it is important to take time to tag them with relevant information. Part number, serial number, condition “AR” for as removed, the date, and N-number of the aircraft. This is helpful if you need to identify the item later, especially if Corey passes them on to someone else.

Once removed and tagged, Corey placed them out of harm’s way and began the task of preparing the panel for installation.

Installation Prep 

Step one for the installation is to inventory everything. Steve and the crew from Oasis Aviation manufactured and delivered the wiring harness, and it looks fantastic. The team even created and provided a wiring diagram. This will assist Corey with the installation of his replacement equipment, and it will become part of the aircraft technical documents to be retained for future reference during maintenance events. Once inspecting it, Corey loosely installed the new wiring harness. Also, the avionics trays are installed loosely. Once the harness is cleaned up, he will secure them in place.

Next, it’s time to wire in the circuit breakers and fasten the routing. This is accomplished with zip ties and a stand, making everything nice and tidy. This will ensure everything stays in place when the new components are installed. It takes more time on the front end but will pay dividends in the long run. Oftentimes, mechanics will race through removals and not take proper pictures or notes. This is a mistake. While in the area, go ahead and do an impromptu inspection. Look for frayed, chafed, or broken wire. Check for visual discrepancies like cracks or corrosion. Use this time to get to know things behind the panel—you are not here all that often.

There is a fair amount of dust and debris that collects behind instrument panels. Give everything a thorough cleaning and use a high-powered light and inspection mirror to see those hard-to-reach places. Another good exercise is to replace any loose or damaged hardware. Stripped screws, broken lock plates, and cracked brackets are common occurrences. Again, use this time to correct any and all issues you find. As a mechanic, one cannot “unsee” problems once they arise. Now that everything is prepped, we will move forward.

What Comes Next

Alright, sports fans, we have come to a stopping point. Yes, I know you want to keep going, but Corey is doing this after hours, and he has a family and a full-time gig to attend to. Trust me when I say you don’t want to rush aircraft maintenance. Even so, it is important to make steady progress. Just like anything in life, your repetition creates your reputation. Don’t rush or skip steps, and always stick to the maintenance plan.

I asked Corey to share his next steps. Here are some maintenance actions that are forthcoming in the refurbishment:

  • Install the new avionics panel.
  • While I had the interior out, Corey pulled all the old fiberglass insulation and discarded it. He is planning on upgrading to a better and newer soundproofing insulation. While the airplane is down for maintenance in one area, you can always use that time to  perform additional upgrades.
  • Next, Corey will need to install GPS antennas and wire them up. We will follow this process with him as well.
  • We removed the old automatic direction finding (ADF) system. After removing the old antenna, we will have to patch the hole made from it.
  • Lastly, we still need to remove the vacuum system.

That’s it for now, folks. Stay tuned as we keep working on Corey’s Cessna 172 project. Don’t forget we are also tracking Stephen and his Saratoga. There is still so much to do. Take care and stay safe!

Login

New to Flying?

Register

Already have an account?